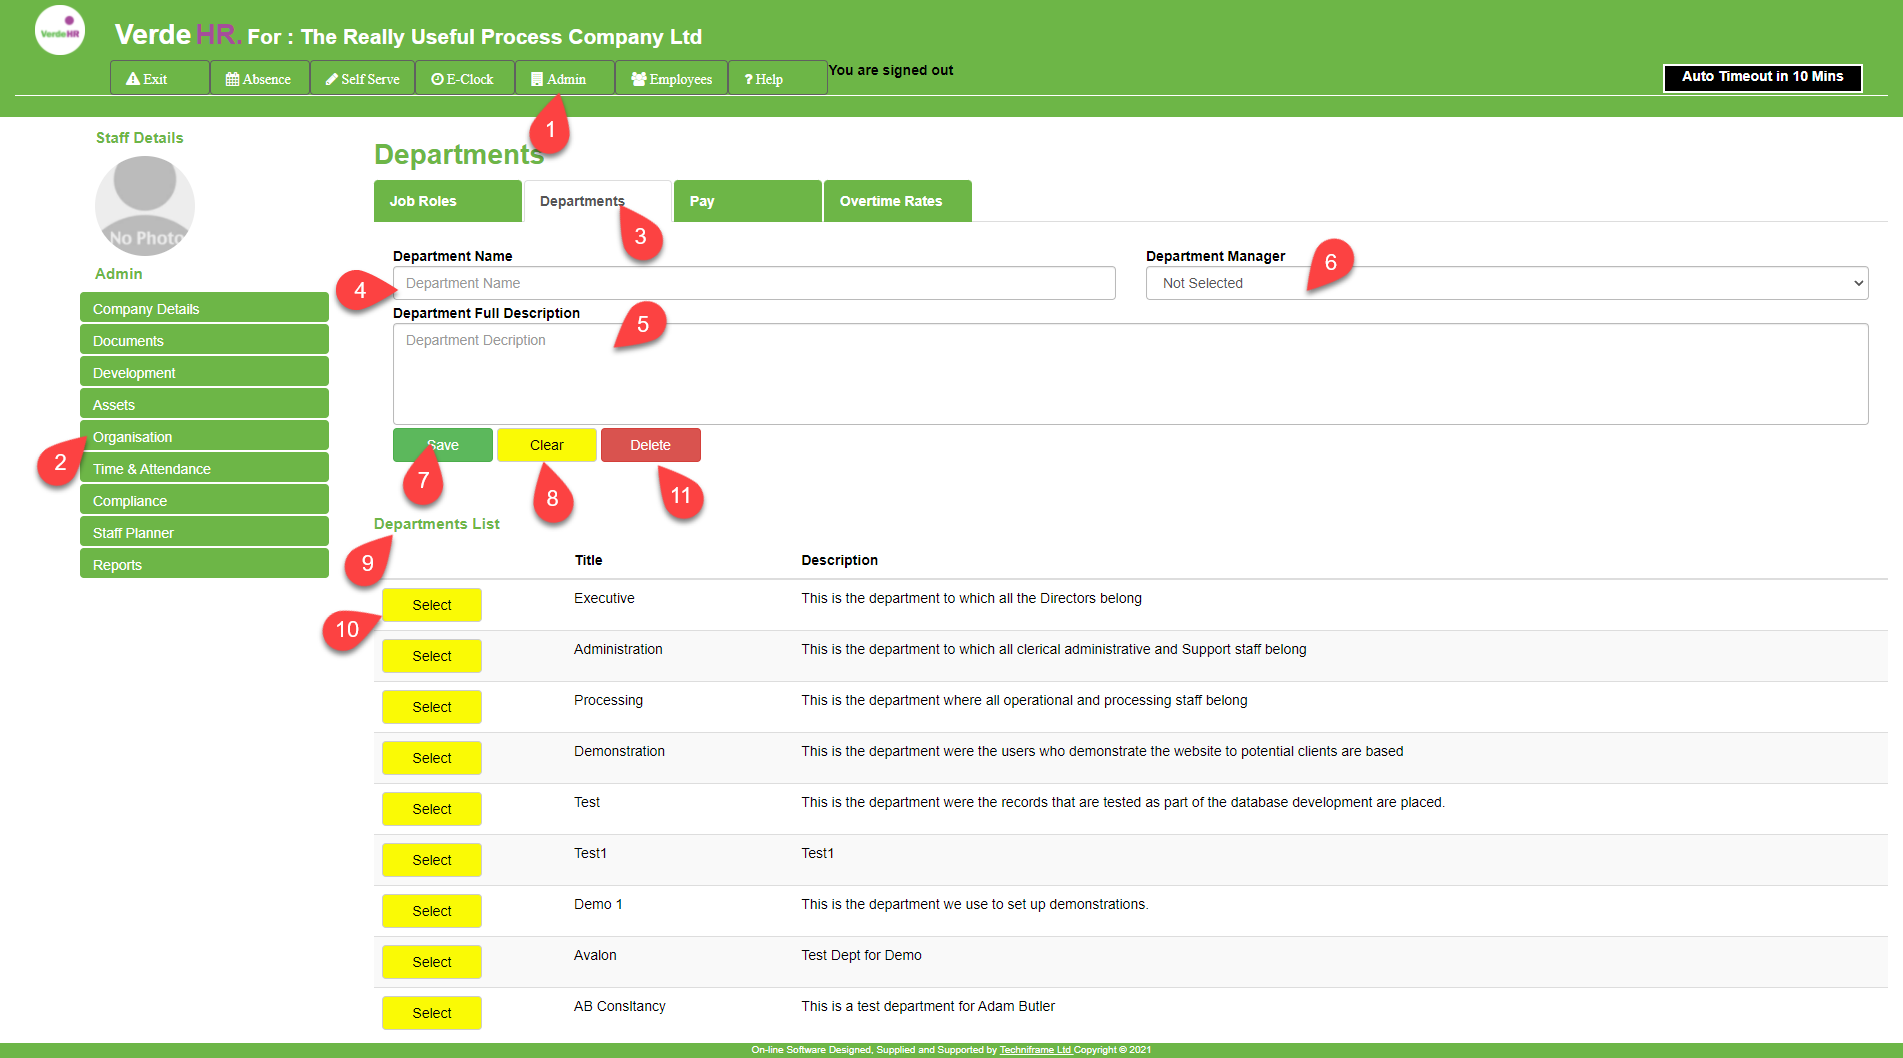
You can create departmental structures in the Admin section of Verde HR. To create a departmental structure, log on to the software. It will automatically open in Self-Serve on the My Holidays page; Click on Admin (see 1 on the screenshot below) in the Top Menu, then select Organisation (see 2 on the screenshot below) from the side menu this will open a new menu below the top menu, select Departments (see 3 on the screenshot below) from that menu.
Create Departments
N.B. You need to have at least one department if you want to create job roles later.
You can create Departments as follows:
- When you select the Department Page, it will open the form you need to complete.
- Type in the name of the Department in the Departmental Name (see 4 on the screenshot below).
- Type in a description of the Department in the Department Description box (see 5 on the screenshot below) This field is otional.
- You can then assign the manager of the department from the drop down list in the Departmental Mananger field (see 6 on the screenshot below) Click Save (see 7 on the screenshot below) to save the Department record.To do this you will need to have populated the database with employees, if you haven’t yet uploaded the employees, this can be left to a later date.N.B If you do not click on Save, the data will be lost once you move to another page or press clear to add new data.
- To add more departments, click on the yellow clear button (see 8 on the screenshot below), this will clear any existing data, then type in the new department name, description and manager.
- Click Save to save the entry of the new department. Each time you add a new department, you must click on Save to save your data, otherwise the record will be lost when you press clear to creat a new record.
- If you want to view or edit any of the departments entries, you will find them listed at the bottom of the screen under Department List (see 9 on the screenshot below). Click on the yellow Select button (see 10 on the screenshot below) of the department you would like to view or edit. You can change the information by overwriting the description or the name of the department, then click Save to save the new information.
- You can delete any data entry by clicking on the clicking on the yellow Select button of the department you would like to Delete. Selecting that Department and Pressing the Red Delete button (see 11 on the screenshot below) . When you delete a department, you must click on Save to save your update, otherwise the record will be reinstated when you move to a new page or press clear to create a new record.
Screenshot
If you want to increase the size of this image, click on “Open image in new tab”. Or use “pinch” if viewing on a phone or tablet.